Exercise 2.4: Cisco Native Virtual Agent for voice channel (NEW!!)
Webex Connect Bot Builder is a Cloud AI platform that offers native conversational omni-channel virtual agent service to customers via a Cisco Contact Center AI (CCAI) solution. The CCAI solution orchestrates and automates voice-based and digital interactions with the end users. To use the Webex, Connect Bot Builder, you need to provision the Webex Connect digital services for your organization.
Task 1. Dashboard overview.
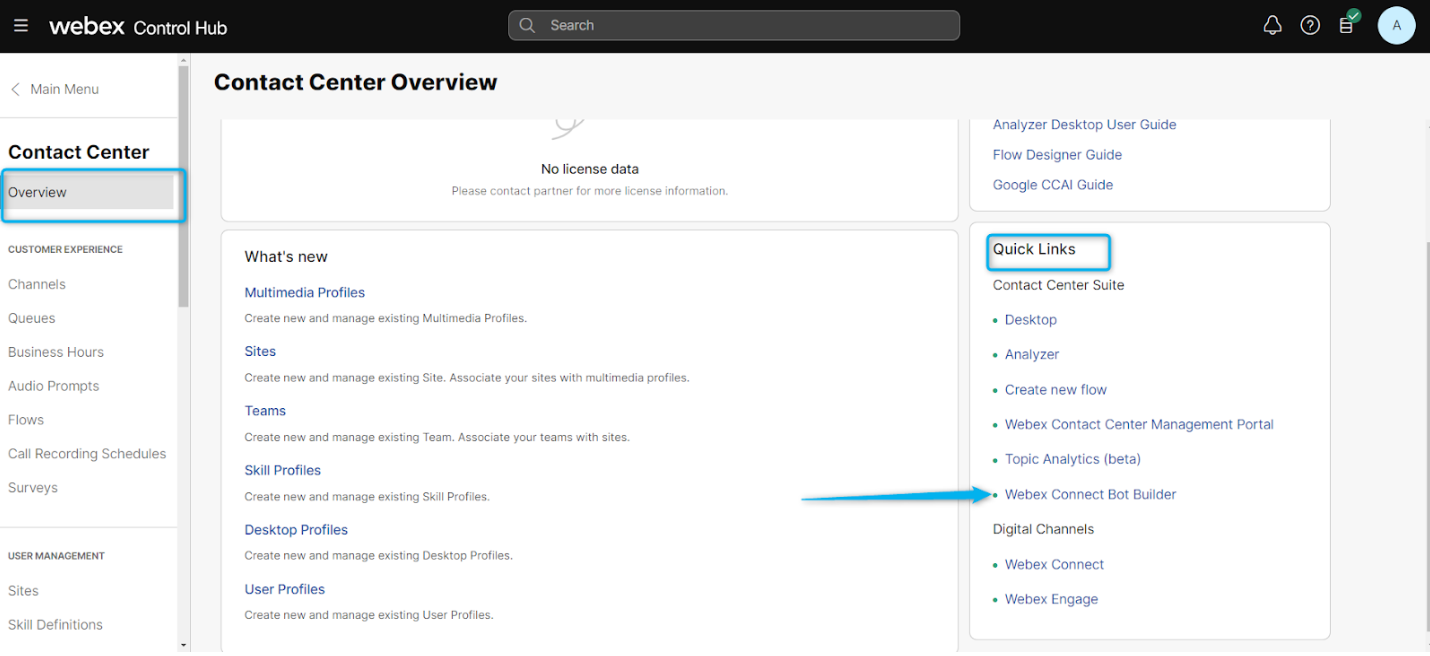
- From the Control Hub, navigate to Contact Center > Overview
- On the Quick Links section click on Webex Connect Bot Builder.
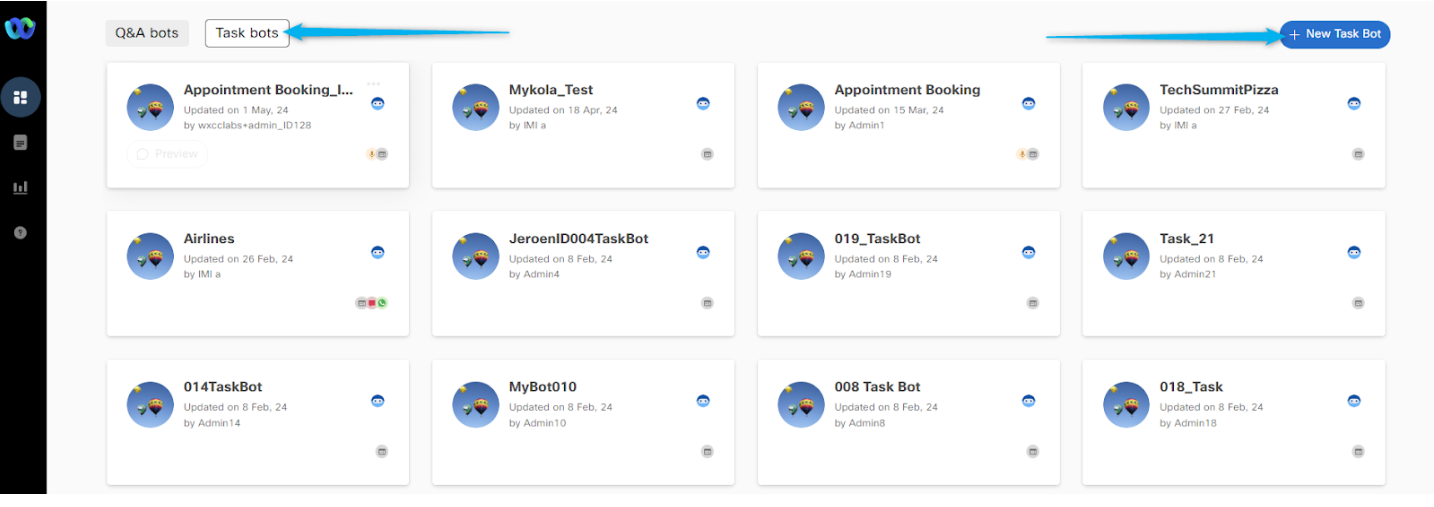
- On the top of the Dashboard, you will see two type of bots available: Q&A bots and Task bots.
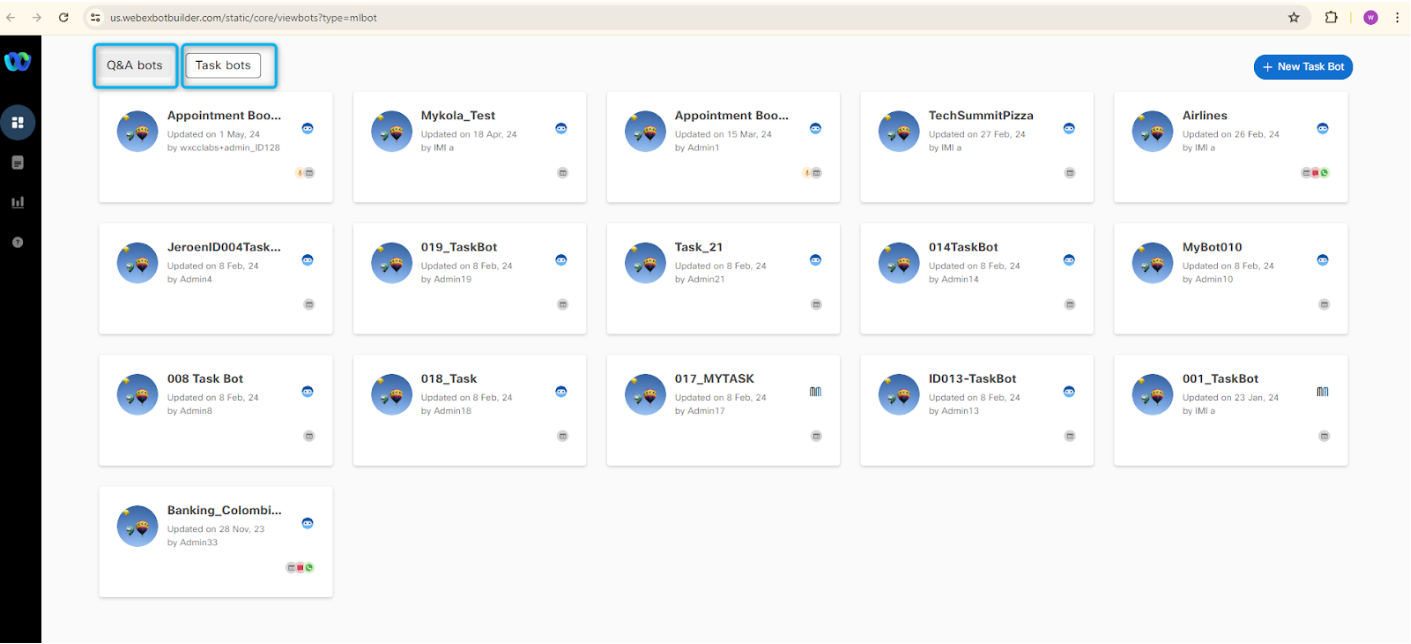
- Q&A Bots are knowledge-driven bots whose knowledge base consists of a series of possible questions (with their alternative syntax) and related answers. Q&A bot is available for Digital Channel.
- Task Bots enable multi-turn conversations where a bot can obtain relevant data from users to perform the task at hand. Task Bot is available for Voice and Digital Channel.
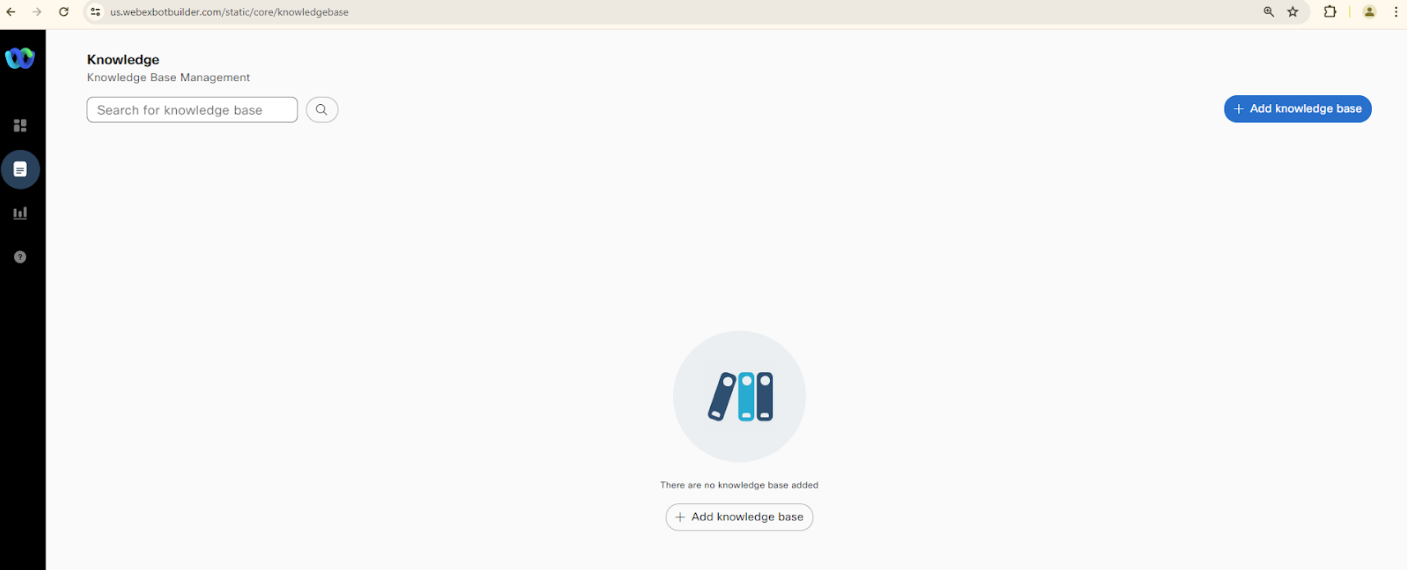
- On the left side there also modules for Knowledge , Analytics and Help . Under Knowledge you can add Knowledge bases and configure them with your bots.
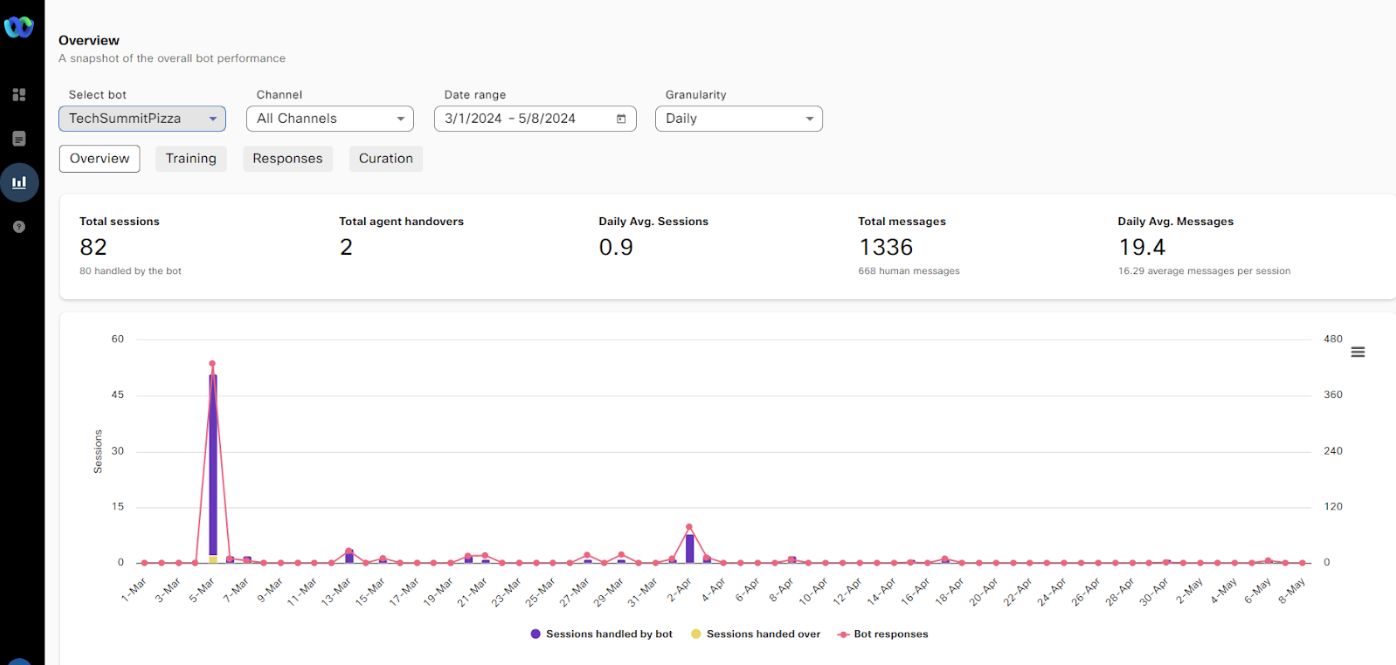
- In the Analytics module you can monitor the bot activity by selecting the bot from the list, specify Data range and other options.
- The Help module directs you to the Webex Bot Builder documentation page.
Task 2. Create Task Bot.
Task bots augment the no-code bot-building capabilities of Webex Bot Builder. Task bots enable multi-turn conversations where a bot can obtain relevant data from users to perform the task at hand. In this lab we would see how to build these Bot to deliver the customer experiences.
- Select Task bots and click on create New Task Bot.
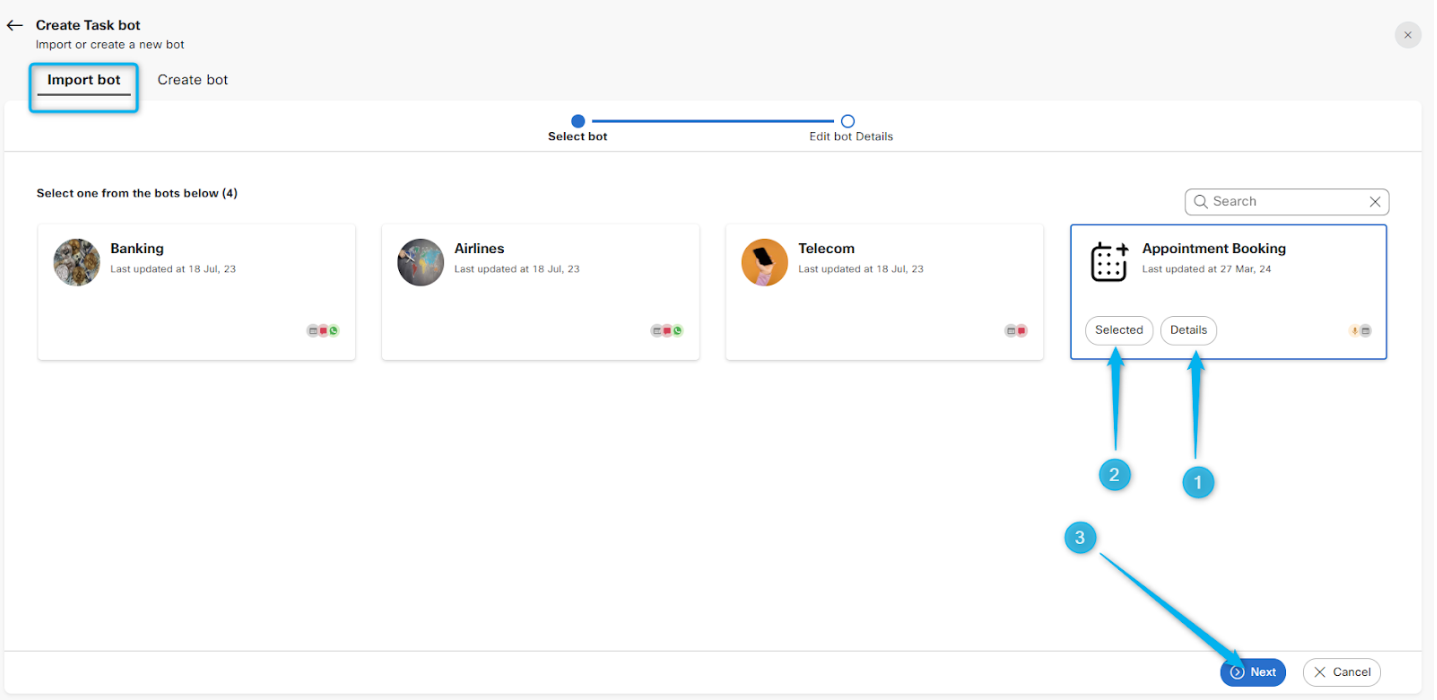
- On the following page you can see that you can utilize some of the prebuild Virtual Agents.
- To see that Intents and Utterances that are prebuild, click on the Details button or the Appointment Booking Bot.
- After the review, select the Appointment Booking prebuild agent for this lab. Then click on Next.
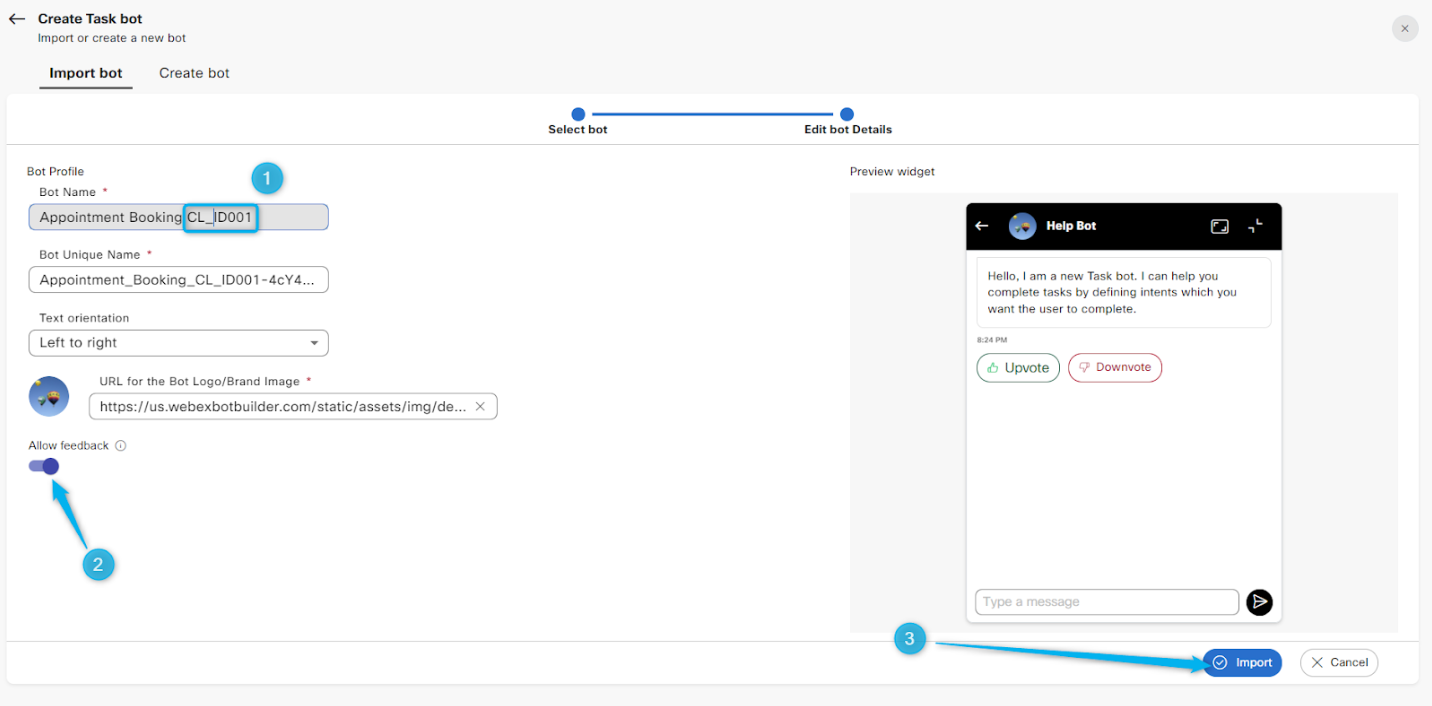
- Add your attendee ID (CL_IDxxx) to the name, Allow feedback and click on Import.
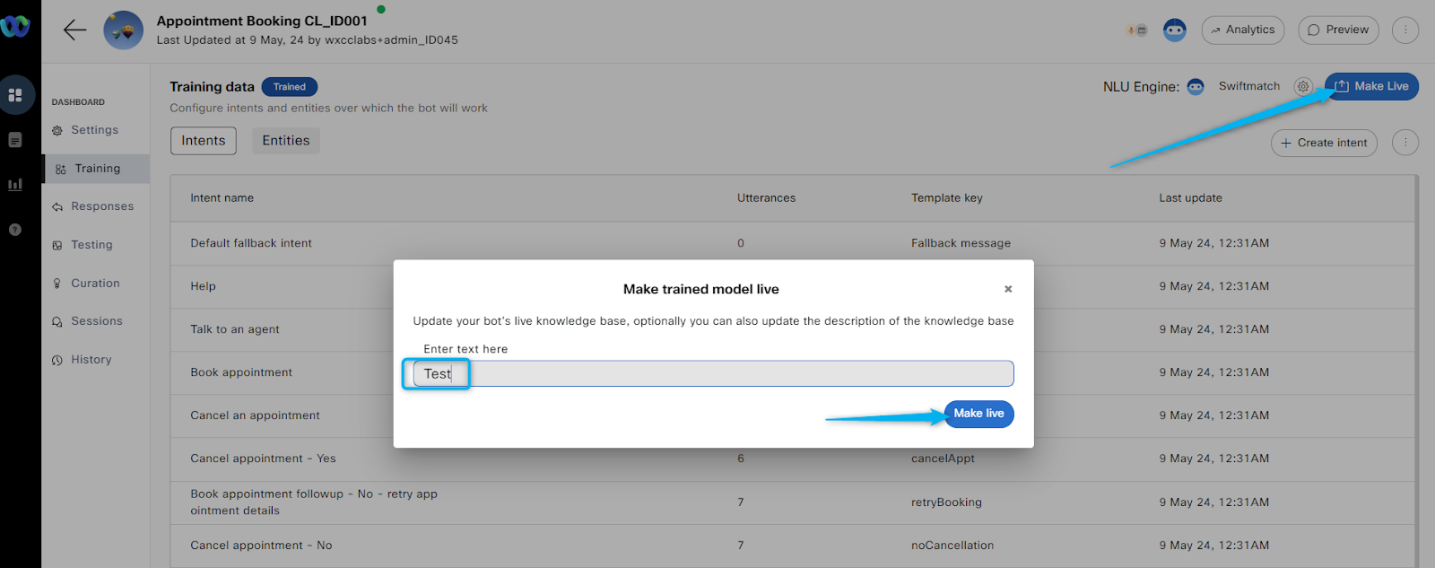
- Now make your bot live by clicking “Make Live” option
Enter text “Test” - Now open your Webex Contact Center flow CL_{YourID}_WxCC_DialogflowCX
- Enable Edit
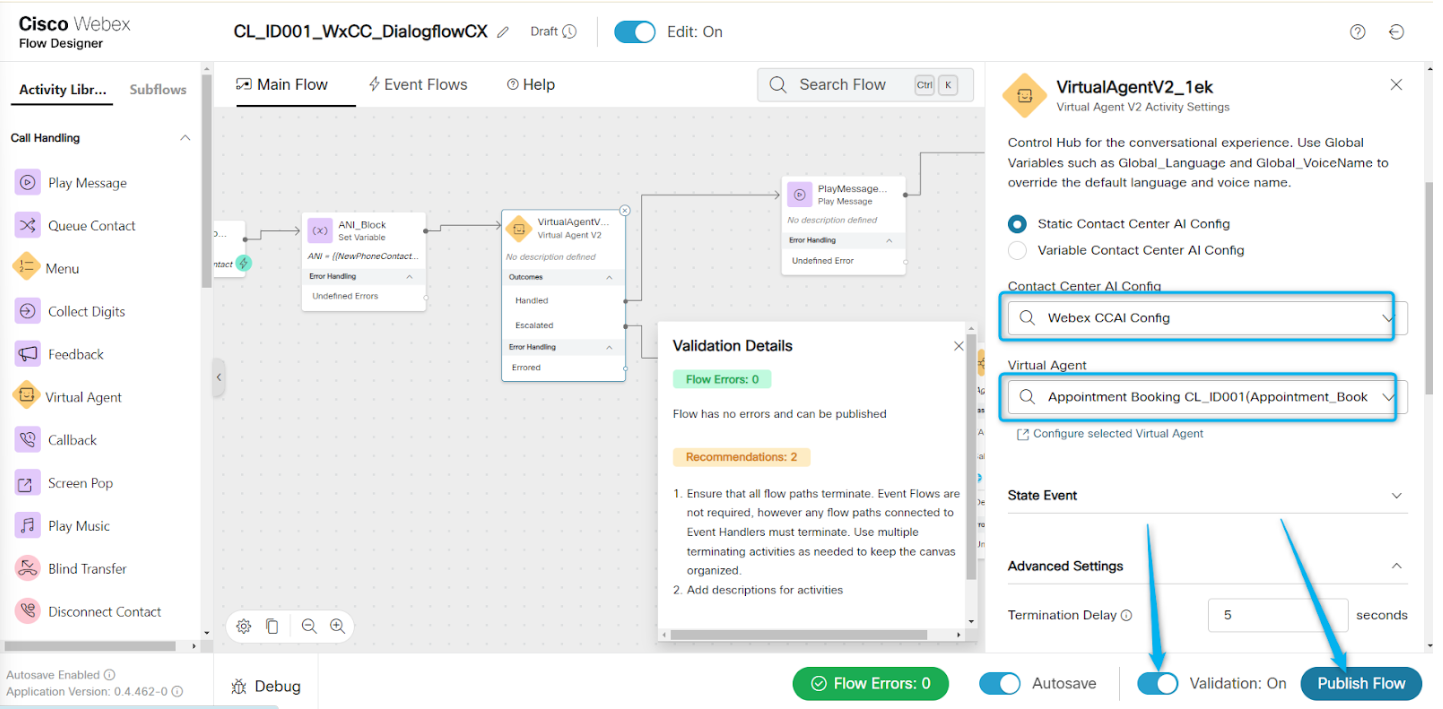
- Select Virtual Agent V2 activity and select the Task Bot that you just created.
- Go to the settings, in the “Contact Center AI config” switch from currently selected Google Dialogflow CX connector to Cisco native Virtual Agent connector by selecting Webex CCAI Config.
- Once selected, you will notice all the Native Task Bots under Virtual Agent.
- Select your BOT created in previous step named with your ID.
- Validate and Publish the flow.
- Call the inbound dial number that is configured with your Entry Point / Channel to book an appointment.
- You should see that bot is well configured to answer to your question and collect the information from you.
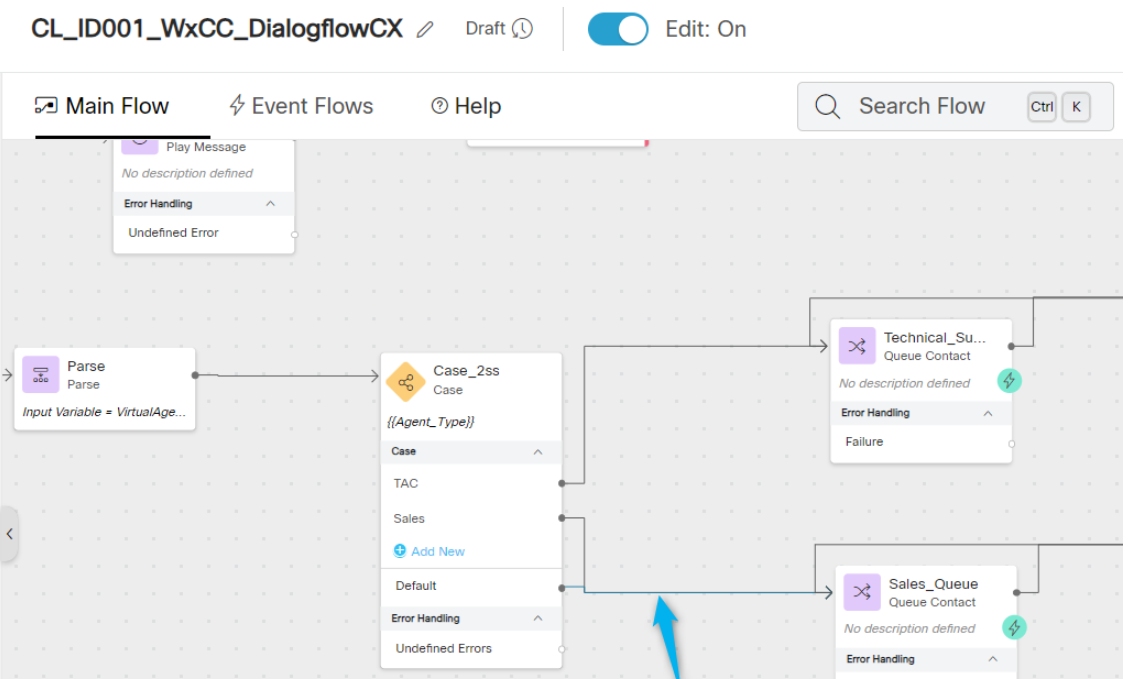
- At the end ask to speak with an agent and the call will be moved to the Sales queue as this is default routing configured in the Case activity in the WxCC flow.
Task 3. Understand the bot configuration modules.
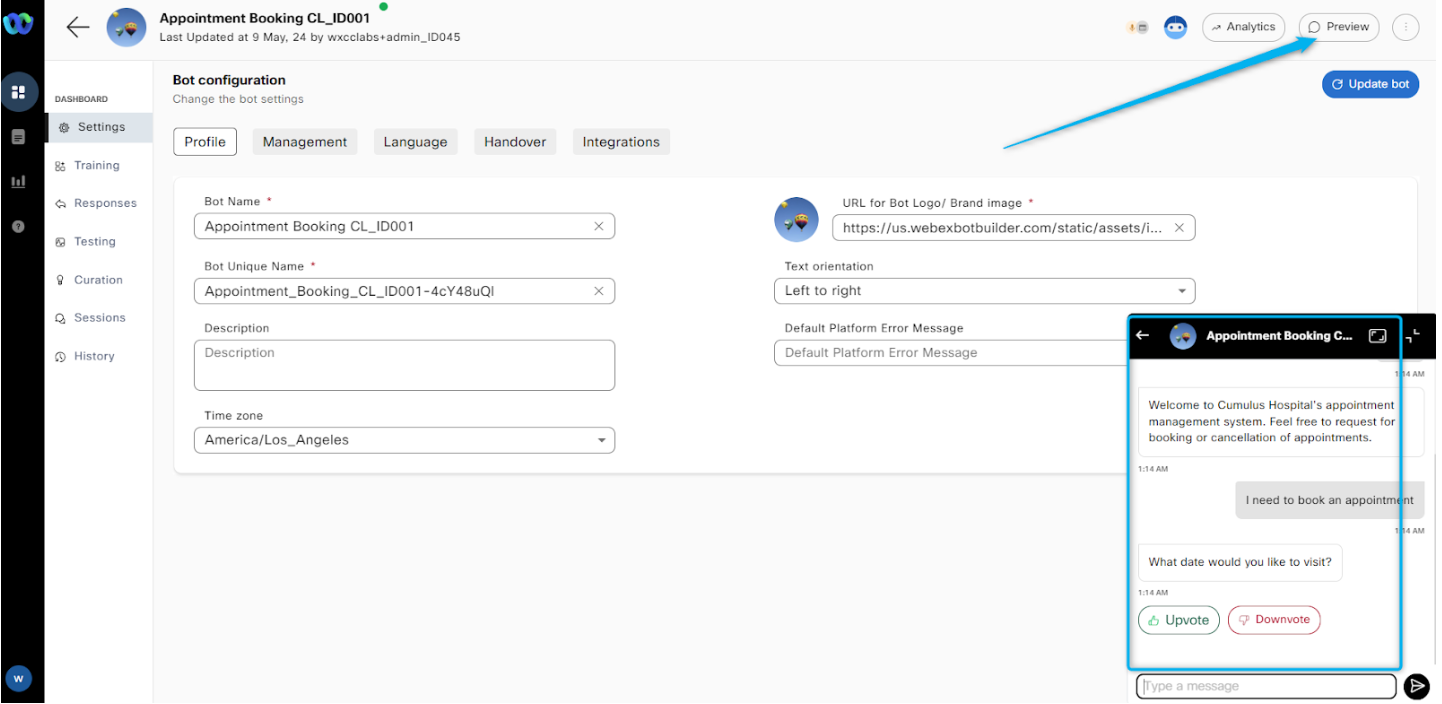
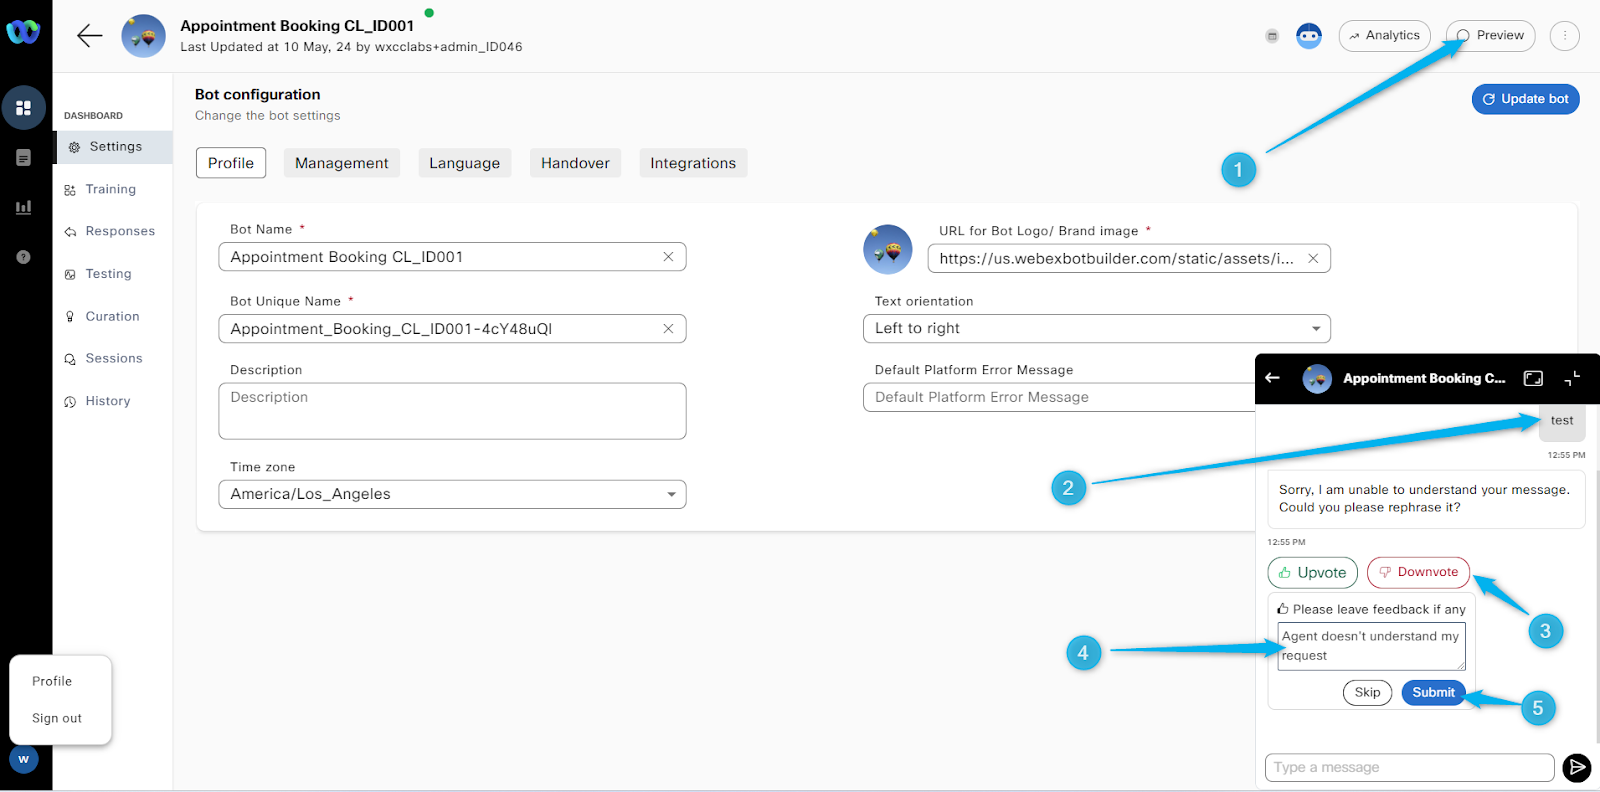
- By clicking on Preview, you can interact with the bot on the chat window and test if this is working as suspect or some configurations need to be corrected.
- The bot supports multiple languages. While on Settings module click on Language and add English language from the drop-down, if the language is not there.
- Click on Update bot.
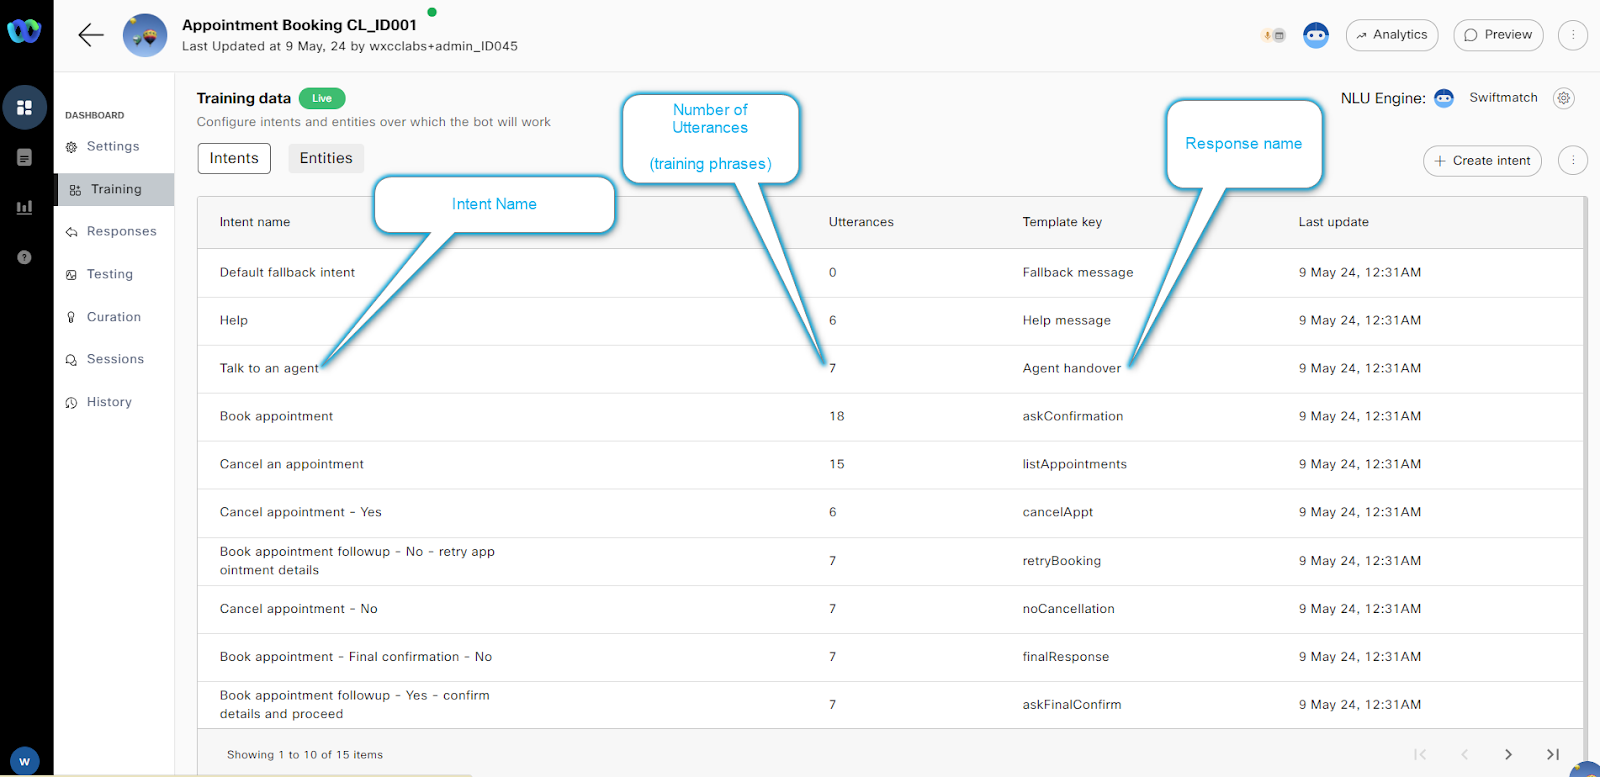
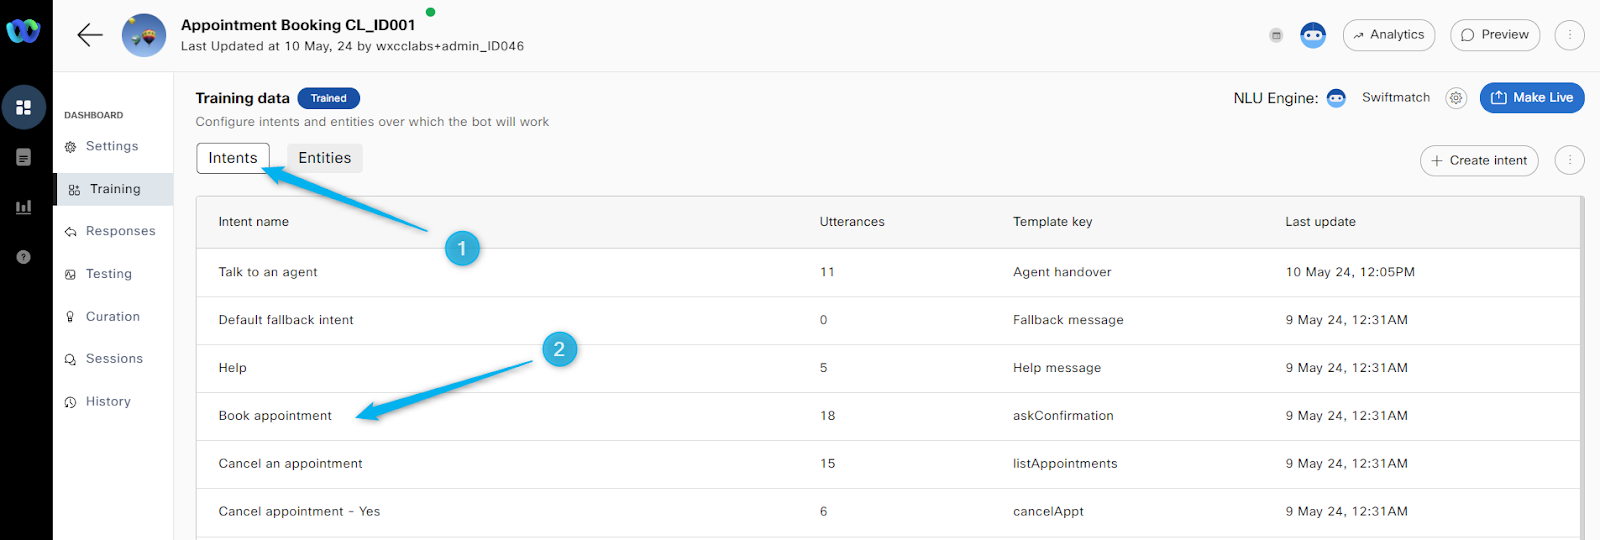
- On the Training module you can see the Intents and their configurations : Intent Name, count of Utterances, and Response name etc.
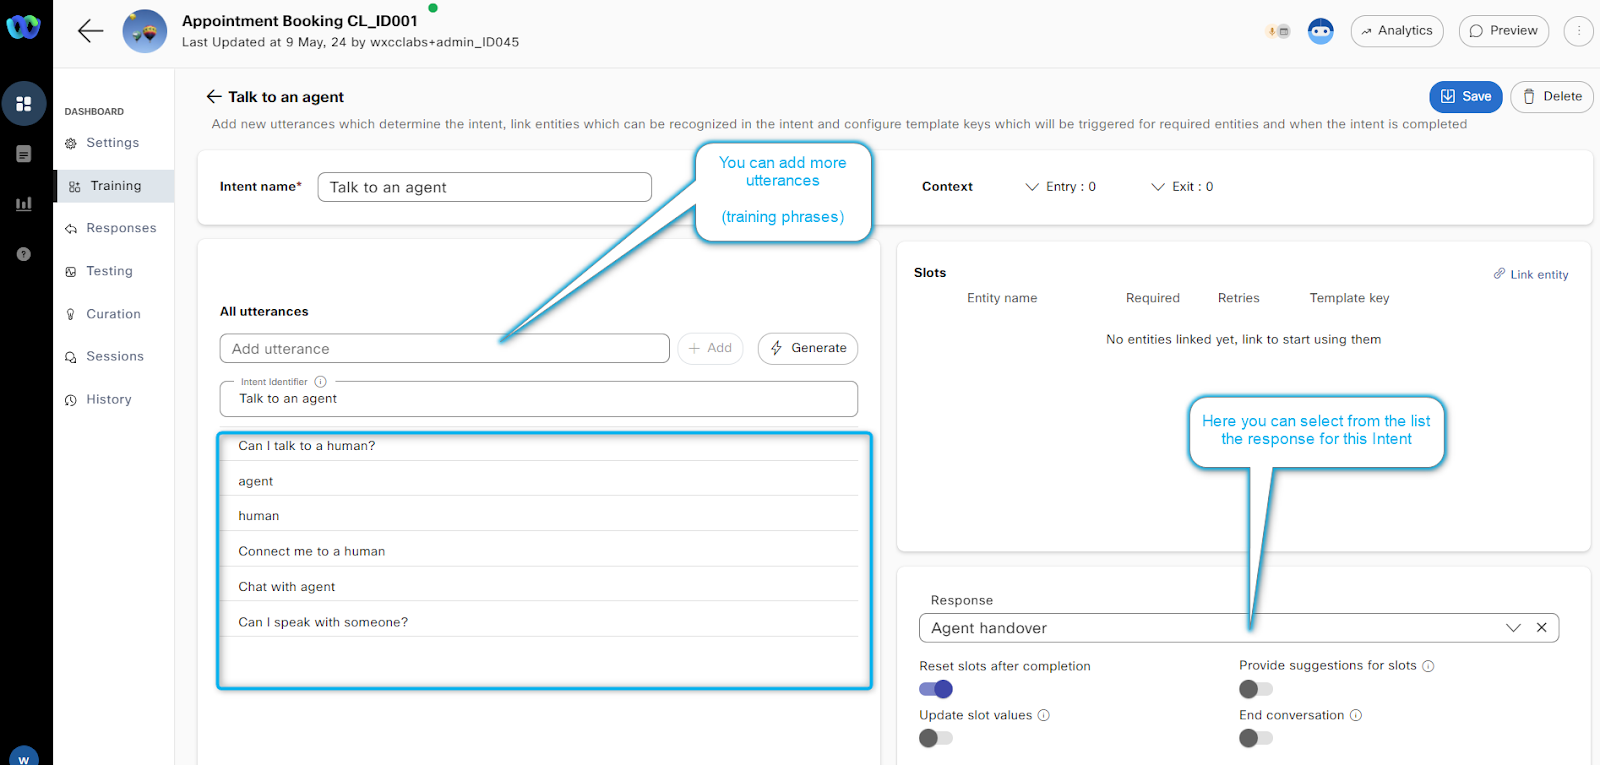
- Open the “Talk to an agent” intent you can see the option to add more utterances and configure the response.
- Generate more utterances using AI.
Click on Generate options. This allows us to cover possible options a customer can use to reach this option in a conversation. - Provide the description for the utterances. Like “Reach an agent”
- Select the number of variants enter 8
- Click on Generate.
- Save the Intent
- Go Back by clicking the arrow next to the intent <-Talk to an agent.
- Now we need to train the BOT to start using modified Intent.
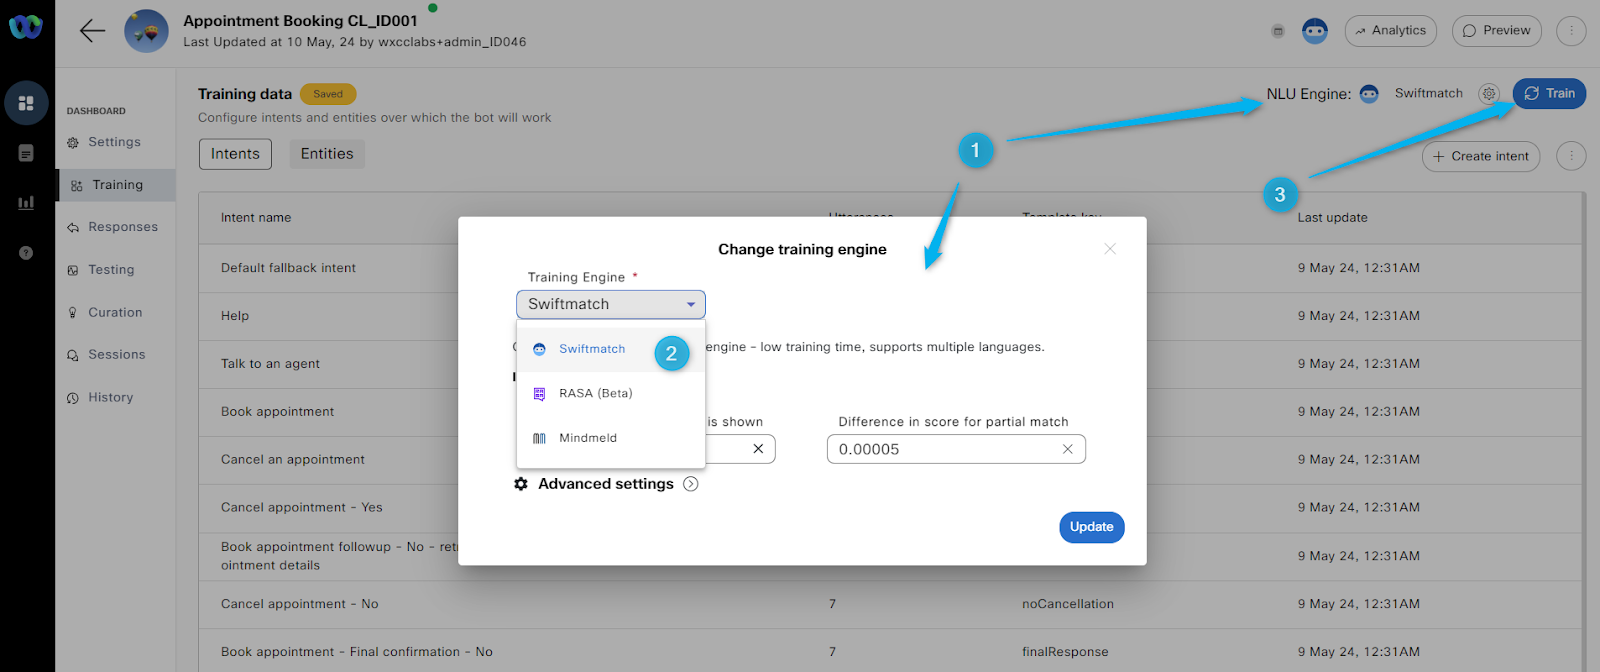
- Click on NLU Engine
- Select the Engine option: Mindmeld (Other options: RASA -BETA, Swiftmatch)
- Click Update
- Click on Train BOT on the right top corner and provide a comment like "test".
- Status next to Training data would show Training and then switch to Trained
- Click Make Live
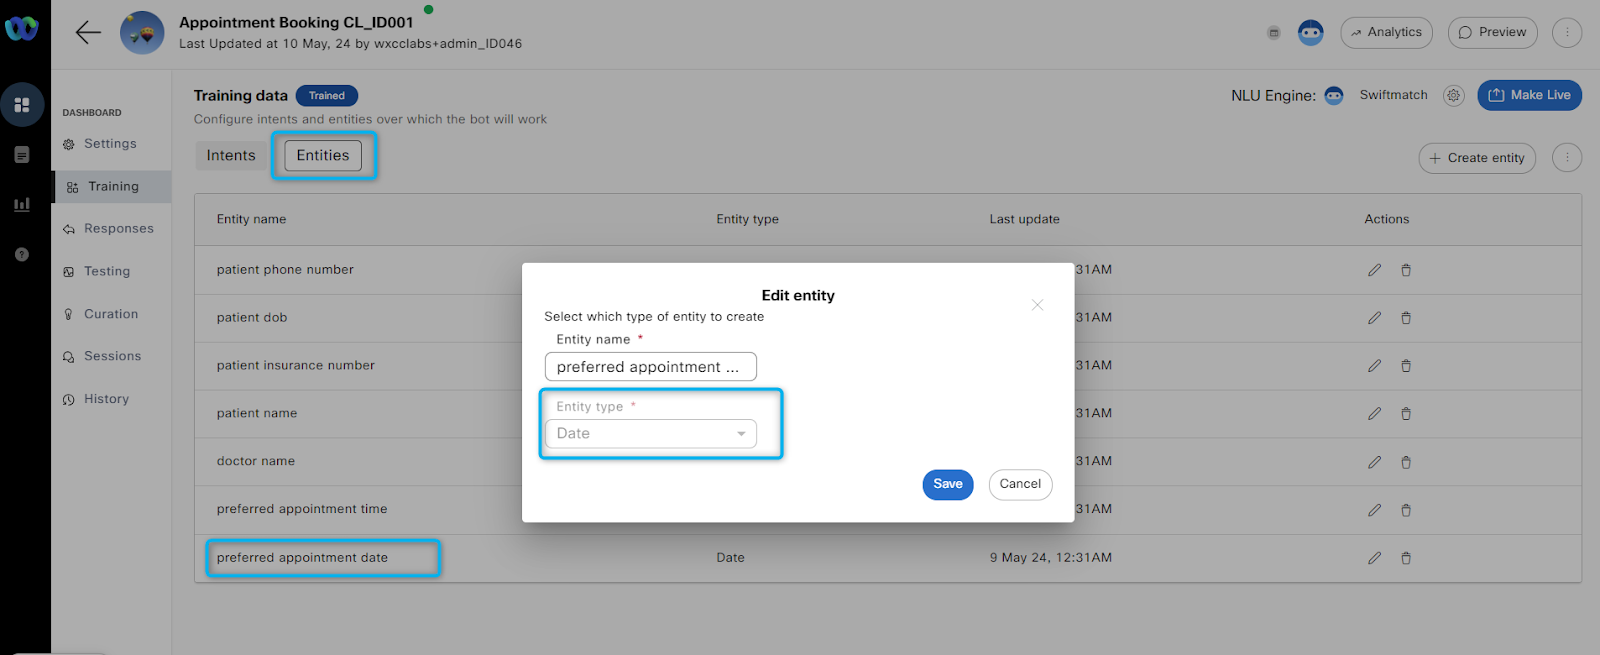
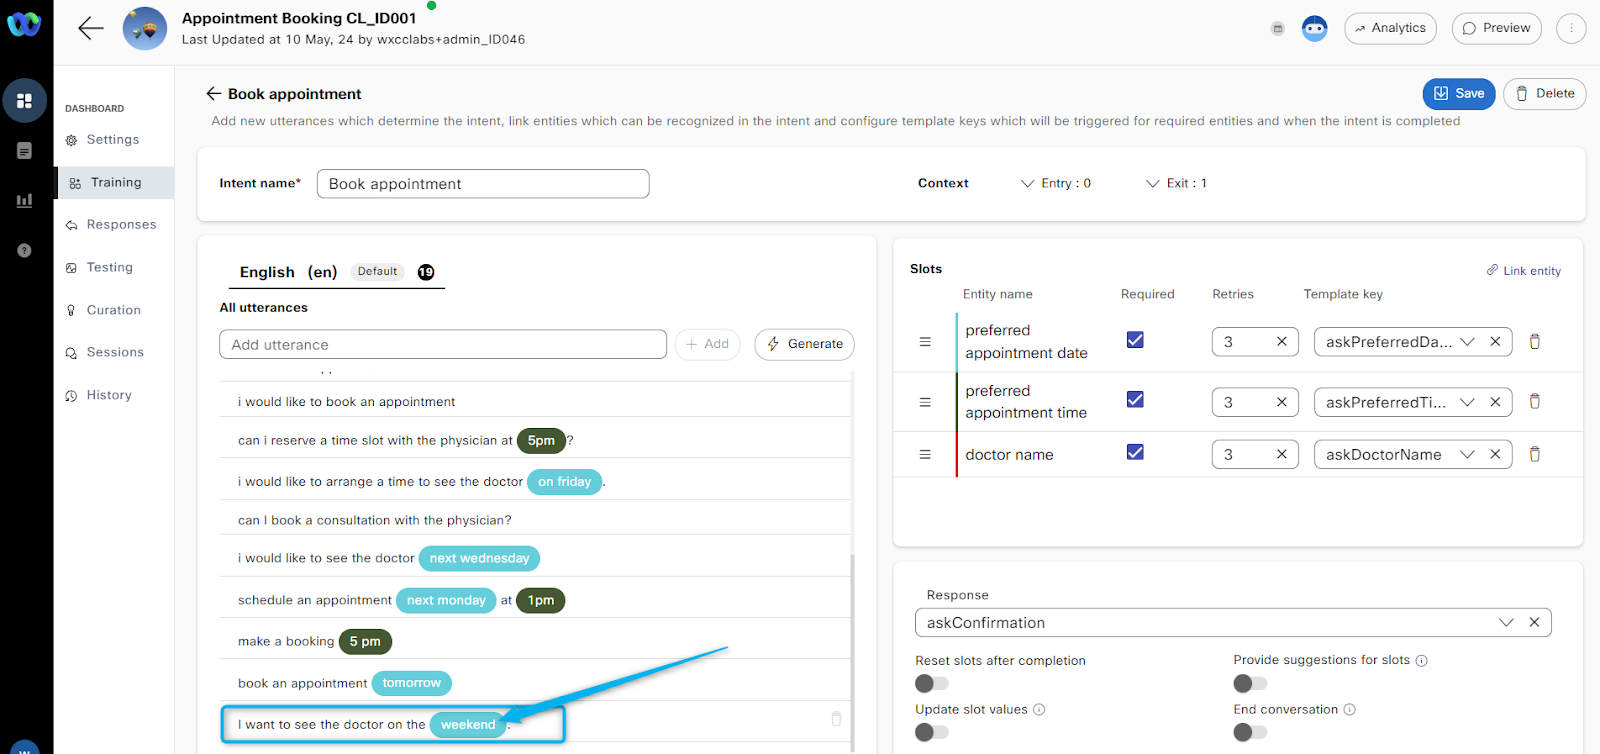
- Entities are the variables that bot uses store the collected information form the users. For example: you can see the Entities with name preferred appointment data with Entity type as Day.
- To add the Entities to the training phrases, go back to Intents and select Book appointment intent.
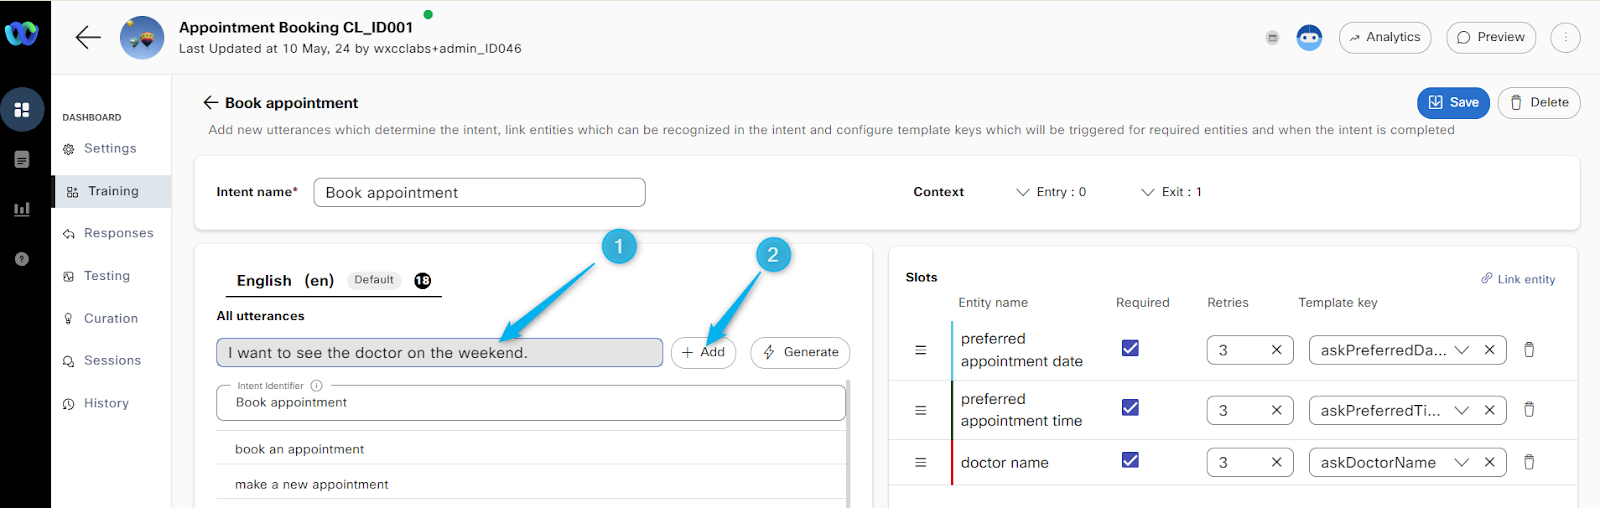
- Add utterance with text “I want to see the doctor on the weekend”.
- Scroll down on utterances and Looking at your just added utterance you can see that weekend is marked with different color.
- System automatically detect it as the time and configure as the Entity.
- If you want manually to specify any part of the utterance as the parameter, you can highlight it and option will popup to select the entity from the available list.
- Review the video below, no need to update.
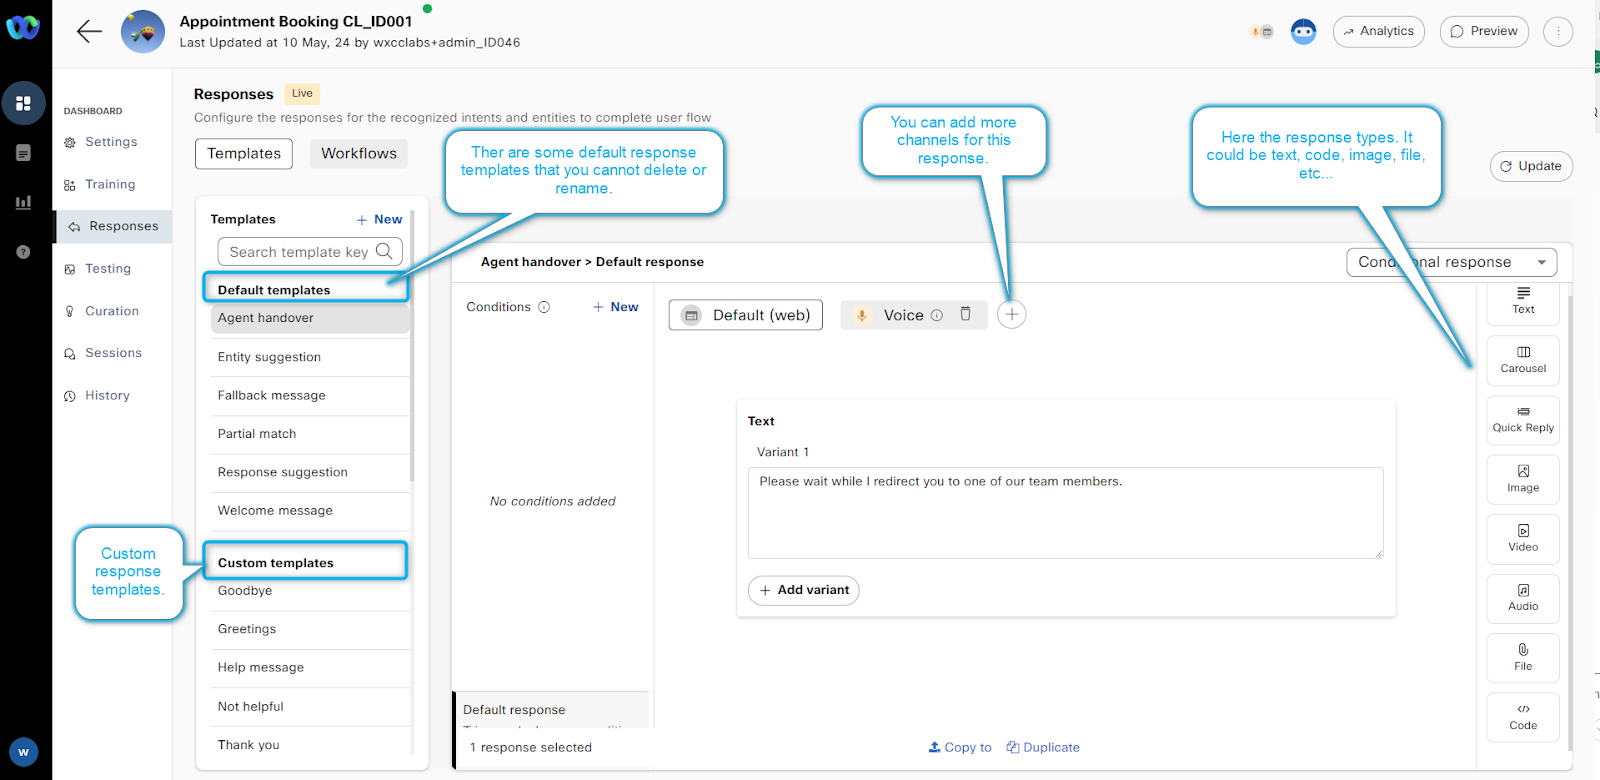
- The Response modules has the template configures.
- There are some Default templates that you can customize but cannot delete or rename.
- There are also custom templates that you can add to the list.
- The response can be delivered over multiple channels and on this module you can configure if this should be for Voice or/and any available Digital Channel.
- On the right side you can see the response types. It could be text, code, audio file, etc.
- Click on Welcome message default response template.
- Select Voice Channel.
- Modify the Text Variant, for example type “Welcome to Cisco Live! How can I assist you?"
- Update and Make it Live.
- Place the test call to your Channel to test that change was applied.
- On the Testing module you can test if the phrases will be trigger the Response Templates or you need to modify your Intents.
- For example if you want to test message “Agent” against Response template Agent handover, the test will be successful as we have the Talk to an agent intent configured properly.
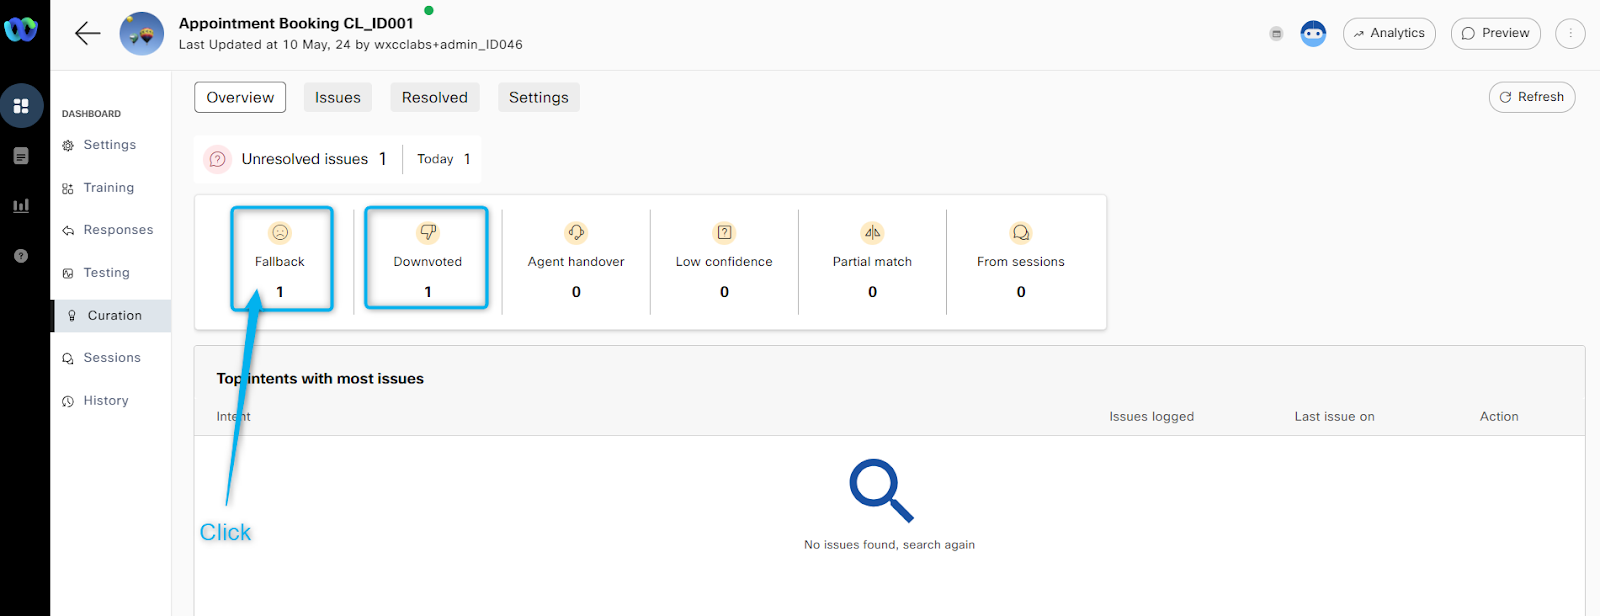
- If the BOT encounter an error, fallback intent, bad feedback or poor intent configuration you can see the details in the Curation module.
- Make a note of count under Fallback
- Click on Preview and enter “Test”.
- It will trigger response related to the Fallback Intent as “test” phrase is not specified in any intent.
- You can also downvote this response and add comment.
- Go back to Curation module or Refresh. You should see that Fallback intent was detected with count went up by 1, as well as Downvoted count incremented.
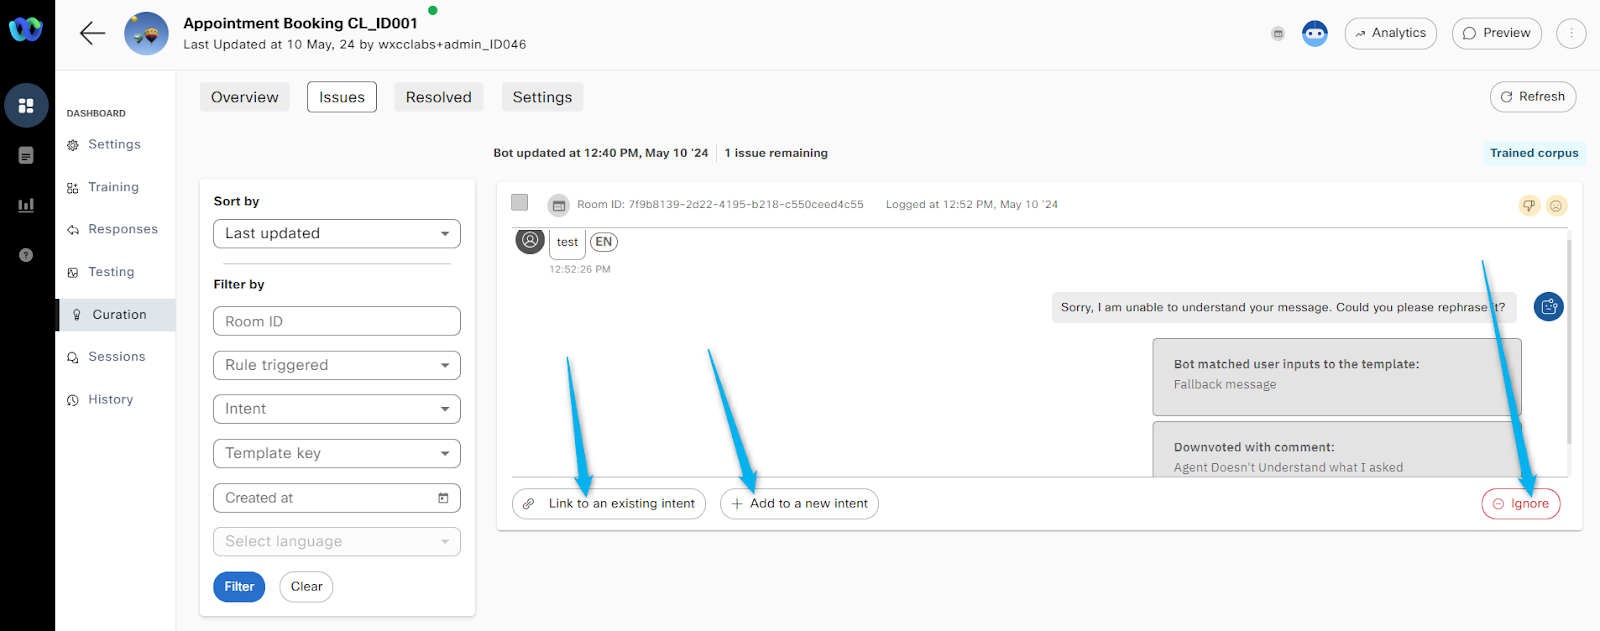
- Click on Fallback block
- Click Decrypt
- You should see options to add “test” phrase to an existing Intent, create new intent for it or just ignore this message.

- For now just ignore it.
- But for the production environment this is the place where you can improve your agent response by adding or modifying the intents.
- Under the Session module you can find all the transcript related to the bot interactions.
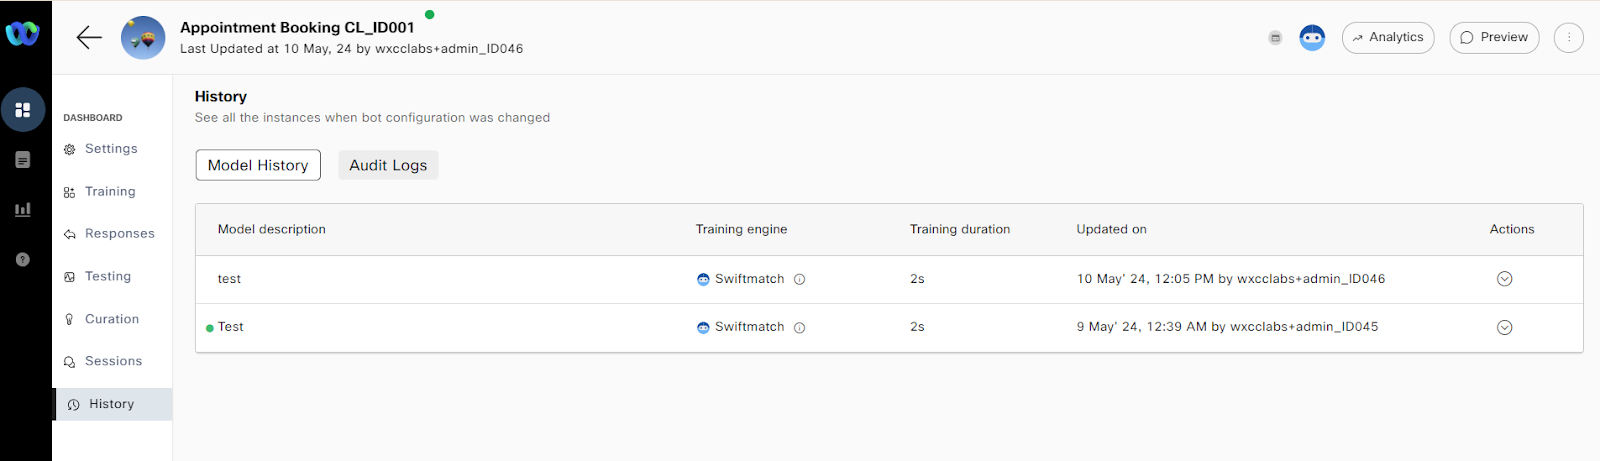
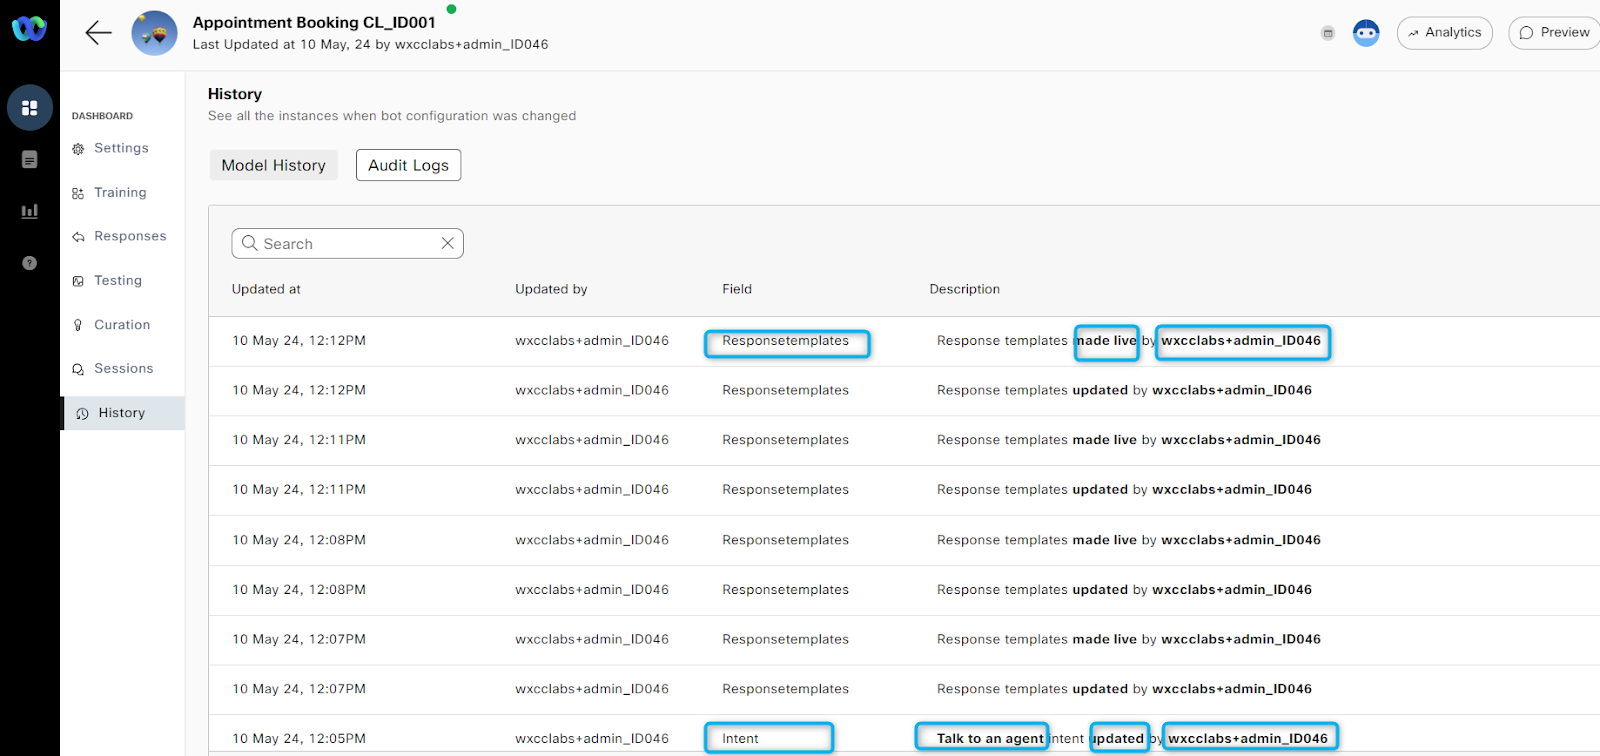
- The History Module contains information about your:
- Bot trainings with Intent updates as well as the Audit Logs.